Interactive notebooks
This material is adapted from the OGGM-Edu’s educational notebooks.
Jupyter notebooks
The Jupyter Notebook is an open-source web application that allows you to create and share documents that contain live computer code, equations, visualizations and narrative text.
If you are new to Jupyter Notebooks, don’t be scared! You can learn about them and try them out on the Jupyter website. I also have prepared a tutorial for you in this lecture.
MyBinder
MyBinder is a service that allows us to provide online computing environments in which the course notebooks can be read and executed. This is a fantastic service that runs on the cloud - each time a user clicks on the top binder link, a so-called “virtual machine” is spun-up and made accessible via the web-browser.
Note
These binder environments are safe, anonymous, and temporary. Temporary means non-persistent: if you close the tab in which the environment was opened, it is lost. If you open the link again, a new environment will be created for you, without your previous modifications. Therefore, if you want to save your work for later (i.e. to be able to upload it in a future binder session), don’t forget to download the files you modified before leaving (see instructions below). Be aware that a Binder environment will be shut down after 10 minutes of inactivity (leaving your tab/window open will count as “activity” only if visible, i.e. leaving the tab open but navigating elsewhere will eventually shut down your session).
MyBinder is a free service provided generously by the Binder and Jupyter communities (FAQ). As such, you can expect some waiting time at launch and relatively limited computer resources. However, these resources should be more than enough to run the course notebooks at home or in class.
Starting a MyBinder environment
After clicking on the Binder link, you should see a loading page similar to the one below (here with the show log button activated):
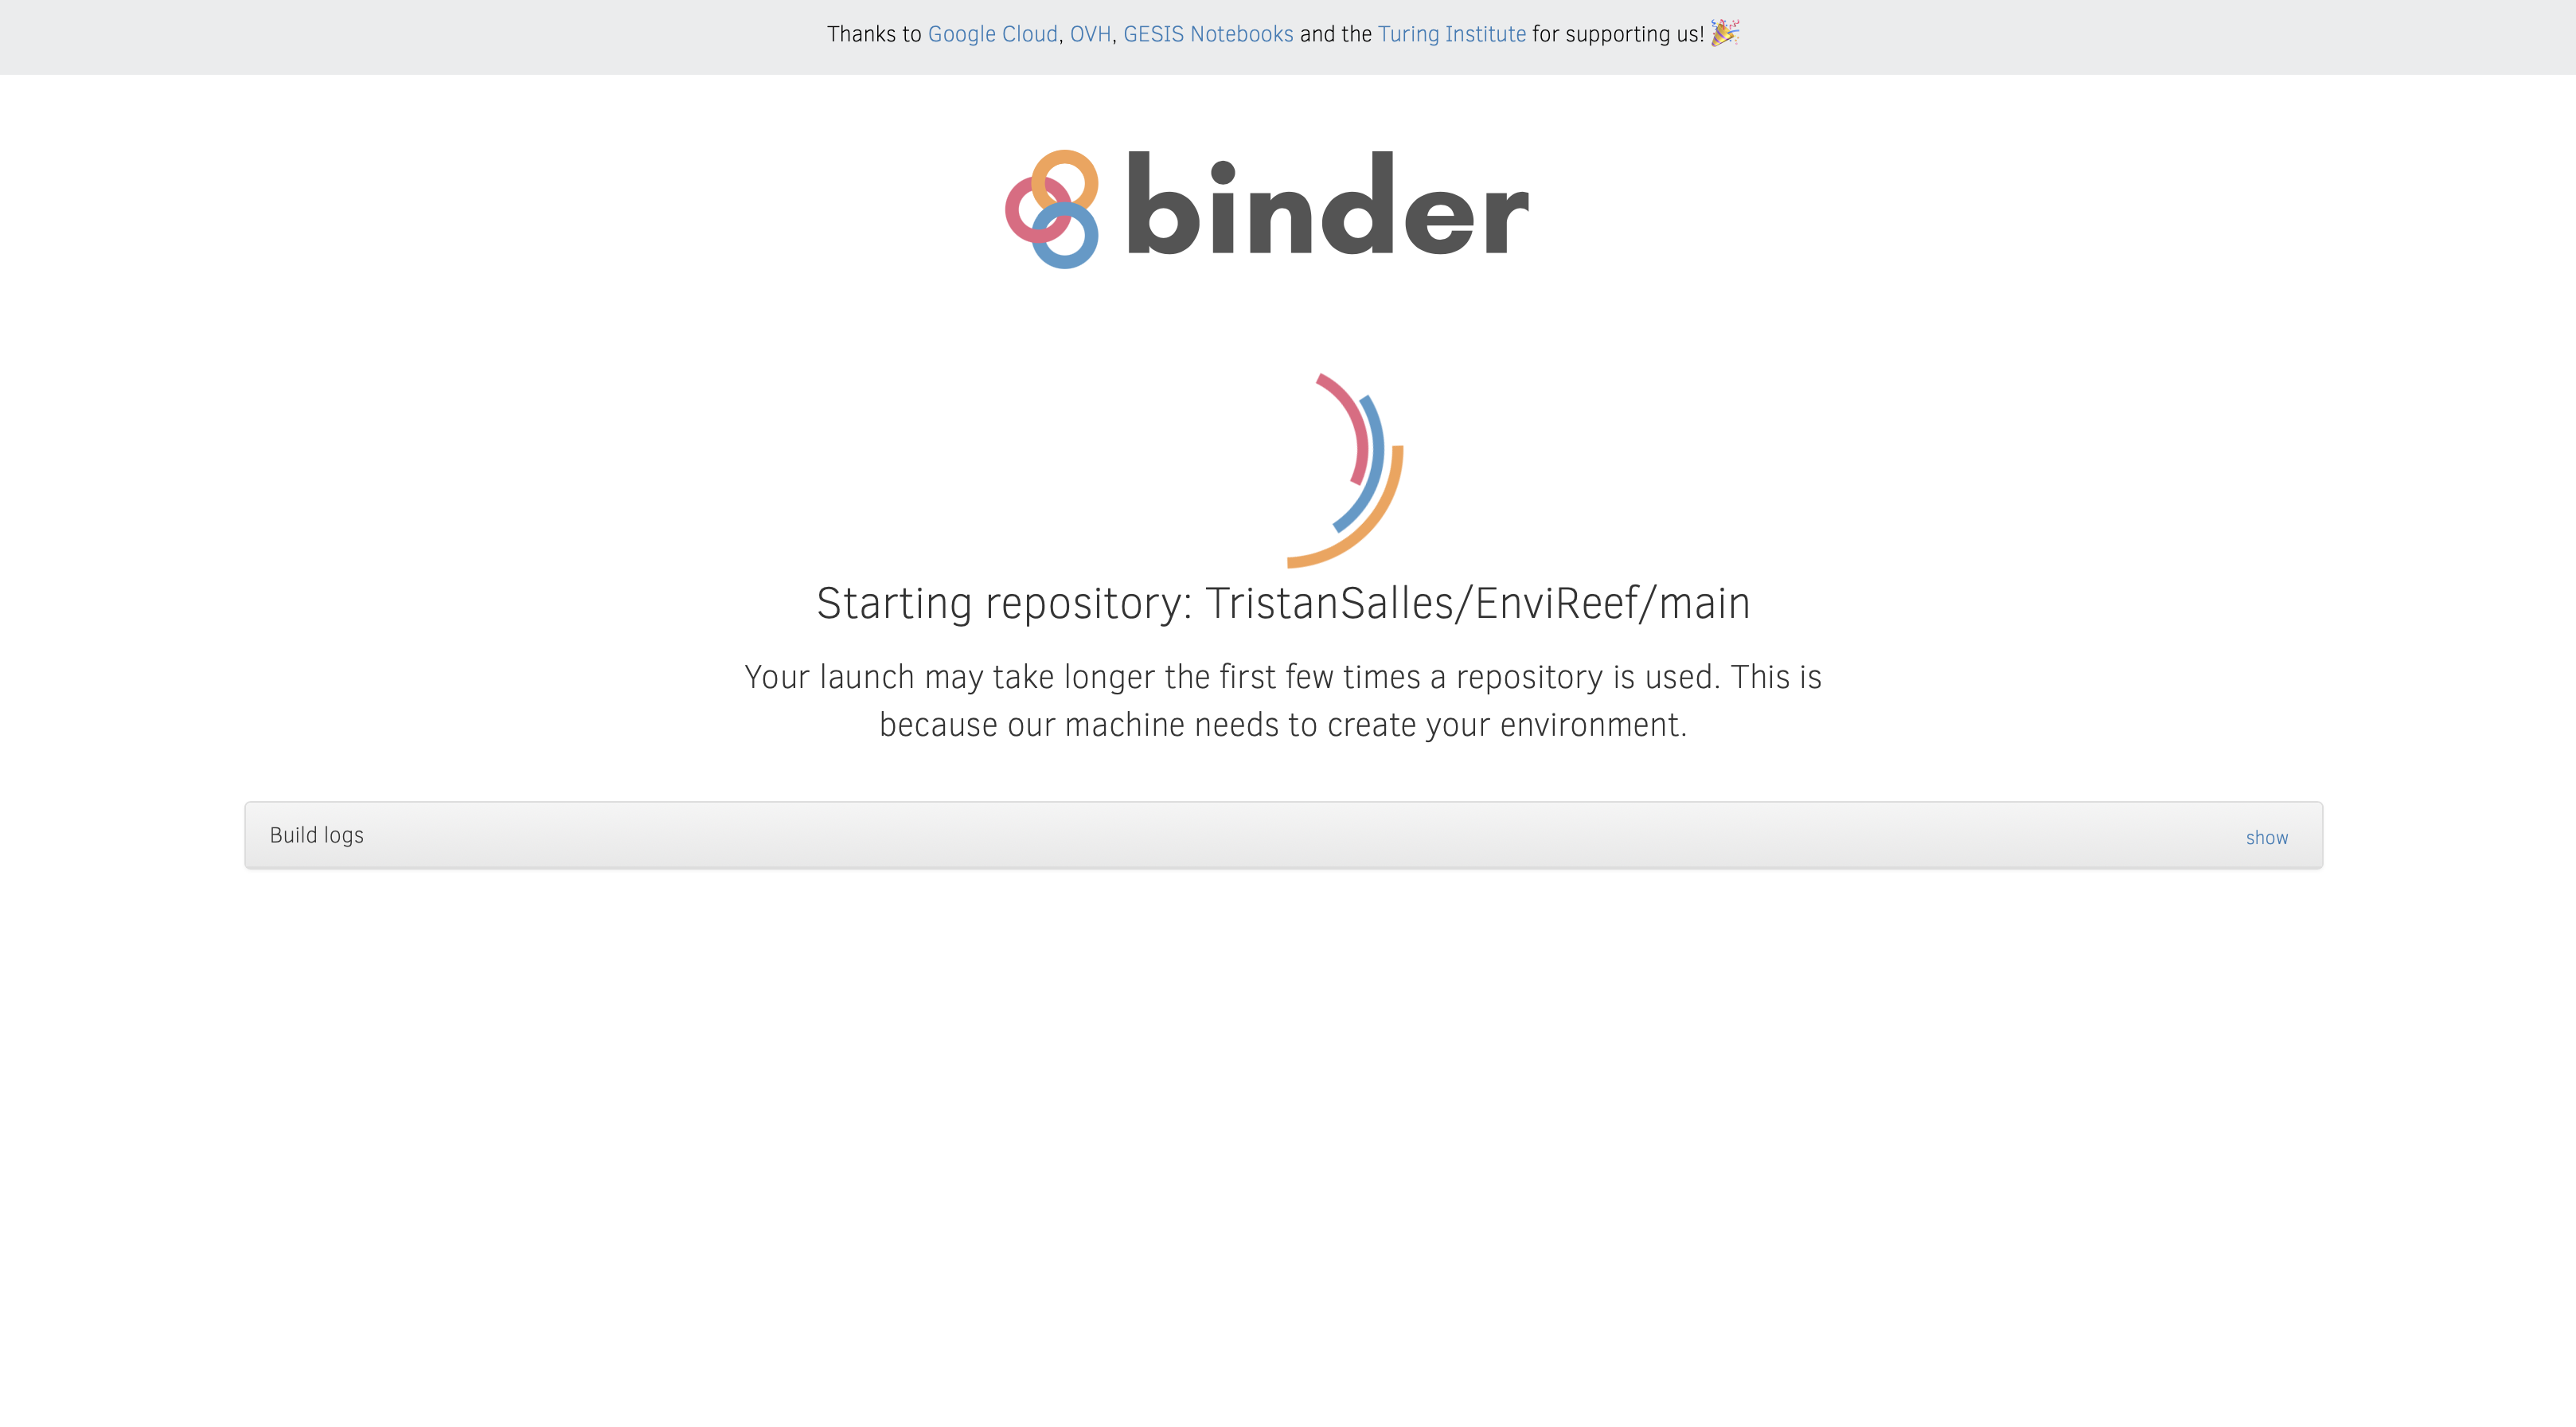
This page indicates that a working environment (called an “image”) was found on the Binder database and is being started for you. This image loading can take from a few seconds to a couple of minutes, depending on the current workload of the service and whether or not the image was already loaded on the virtual machine.
In rare cases, you might encouter a start log with more verbose output, such as this one:
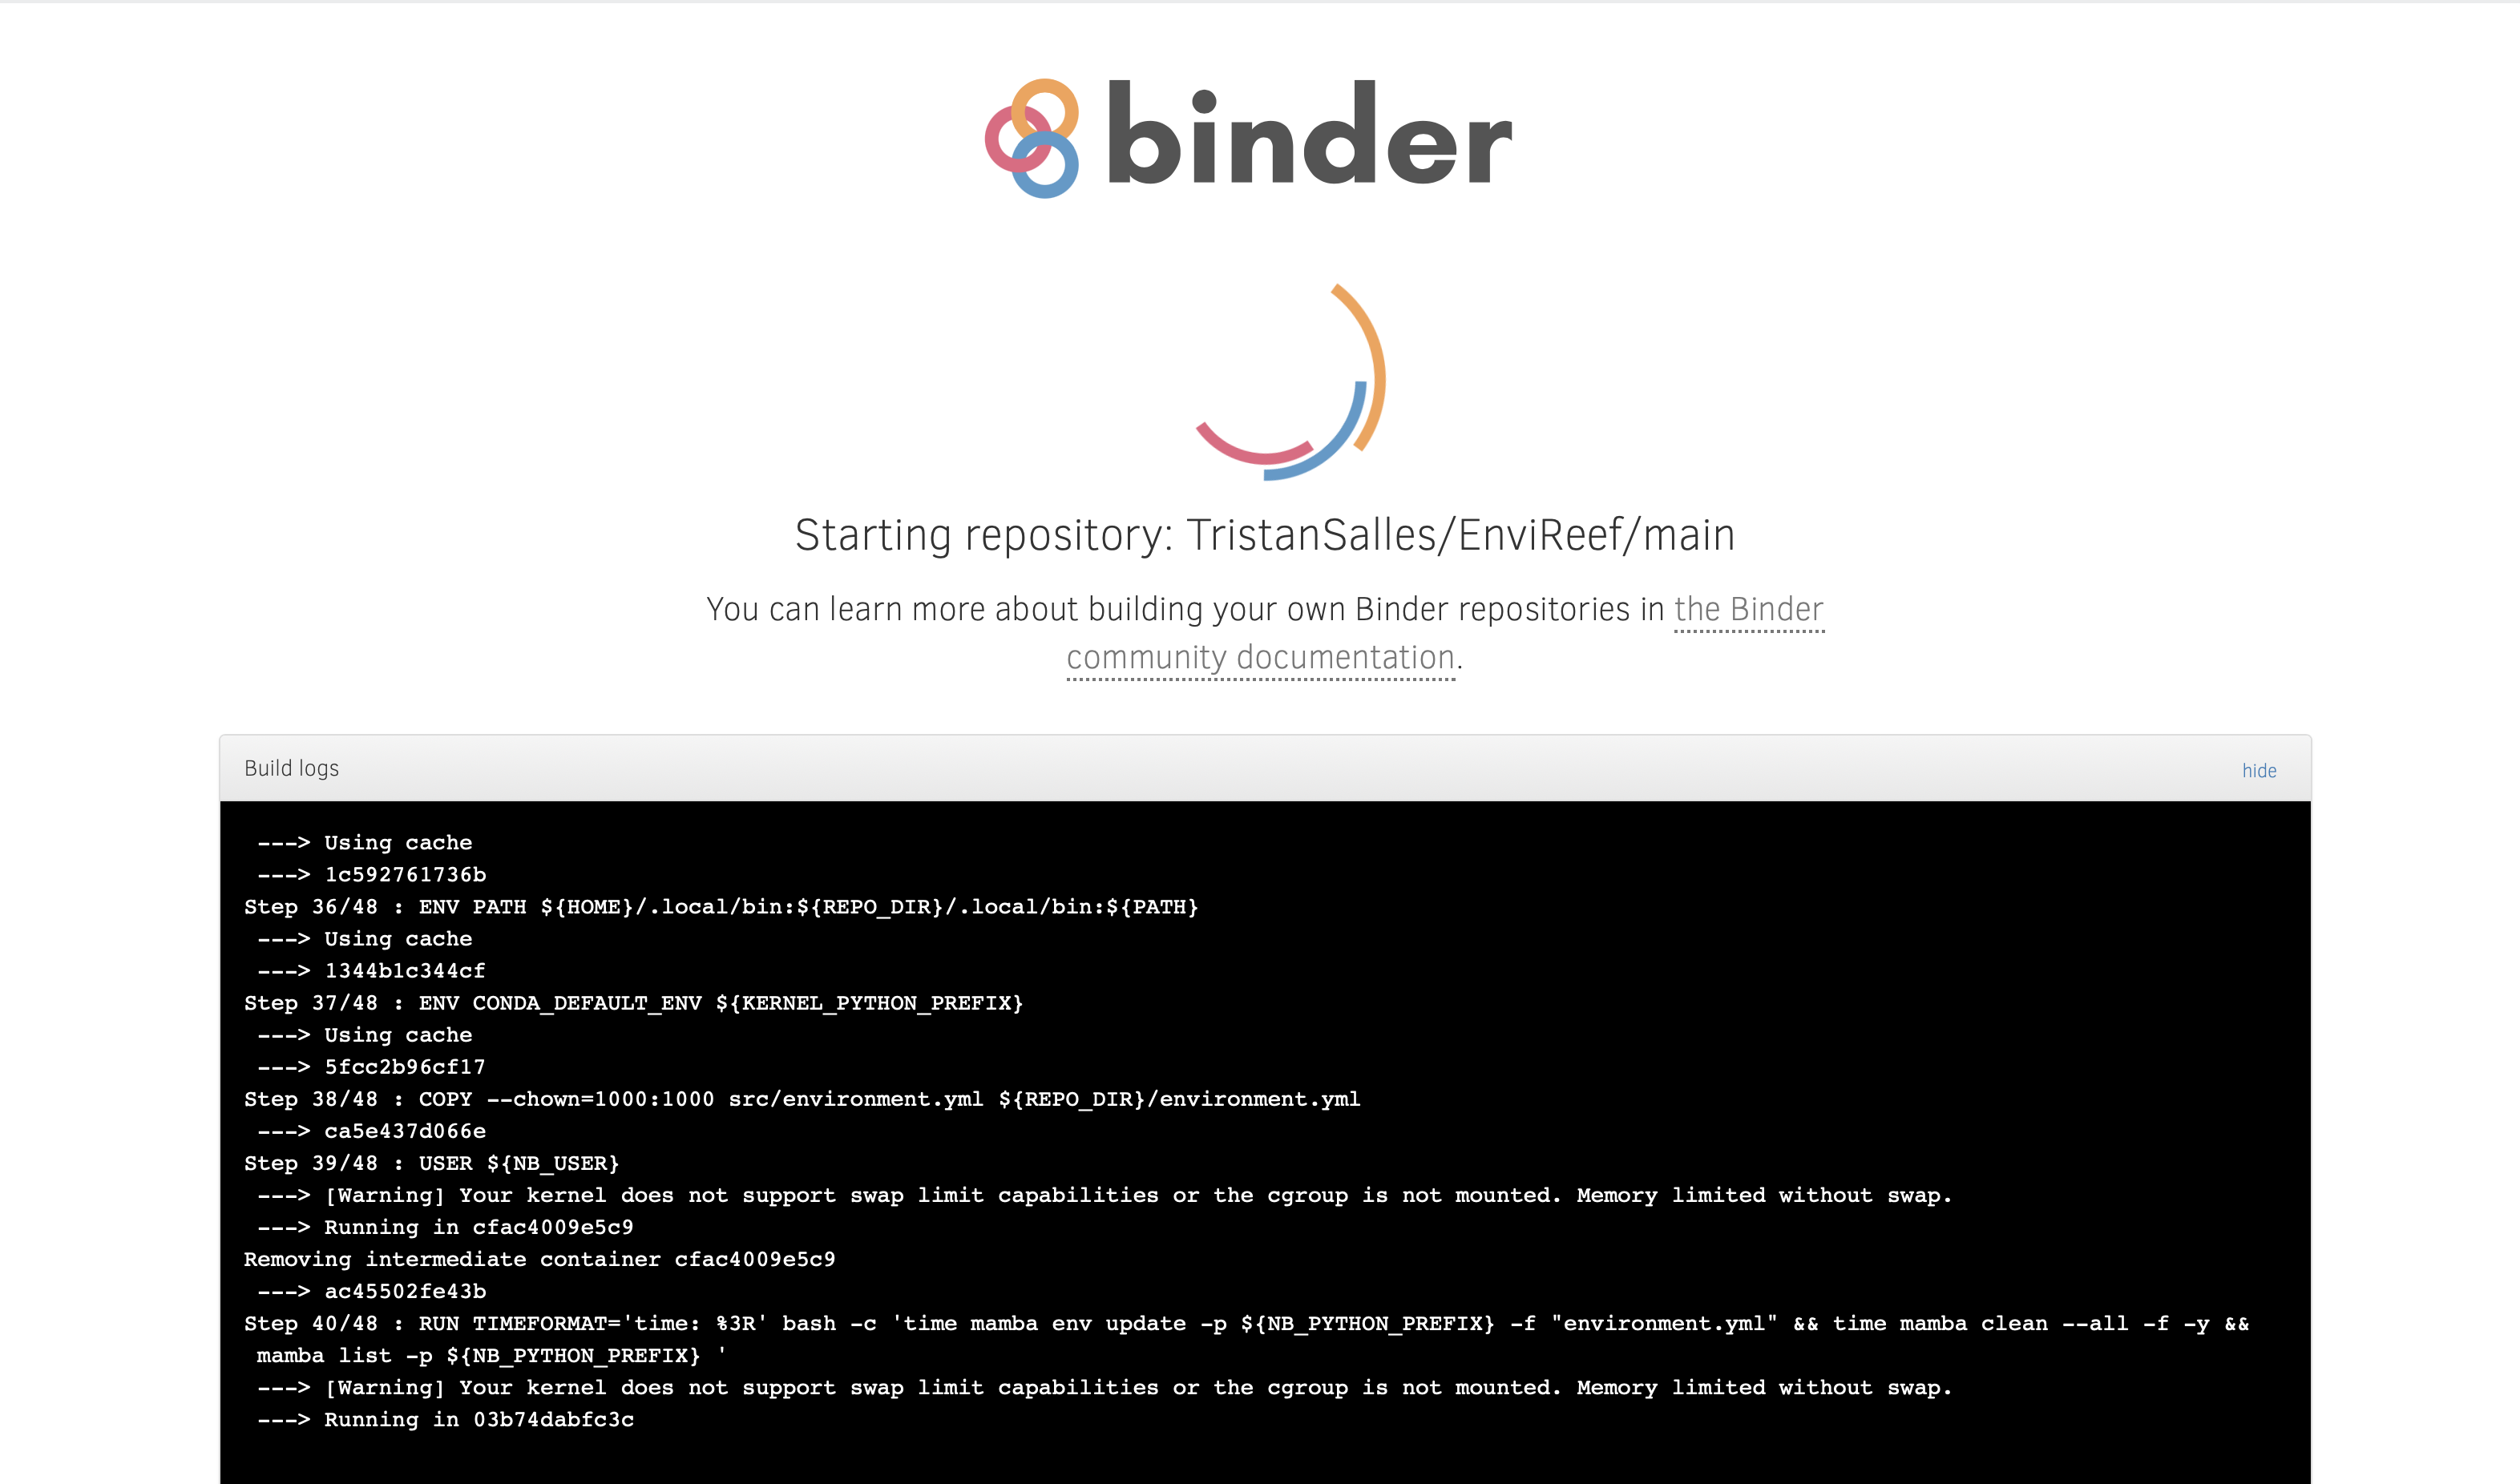
This occurs when the image needs to be created anew. In these rare cases, the builds can take up to 15 minutes. Be patient!
Note
Sometimes, the log screen might show an error of the type “Failed to connect to event stream”. When this happens, simply refresh your browser (or click on the OGGM-Edu link again)
JupyterLab
Once the Binder environment is ready, you should see a page similar to this:
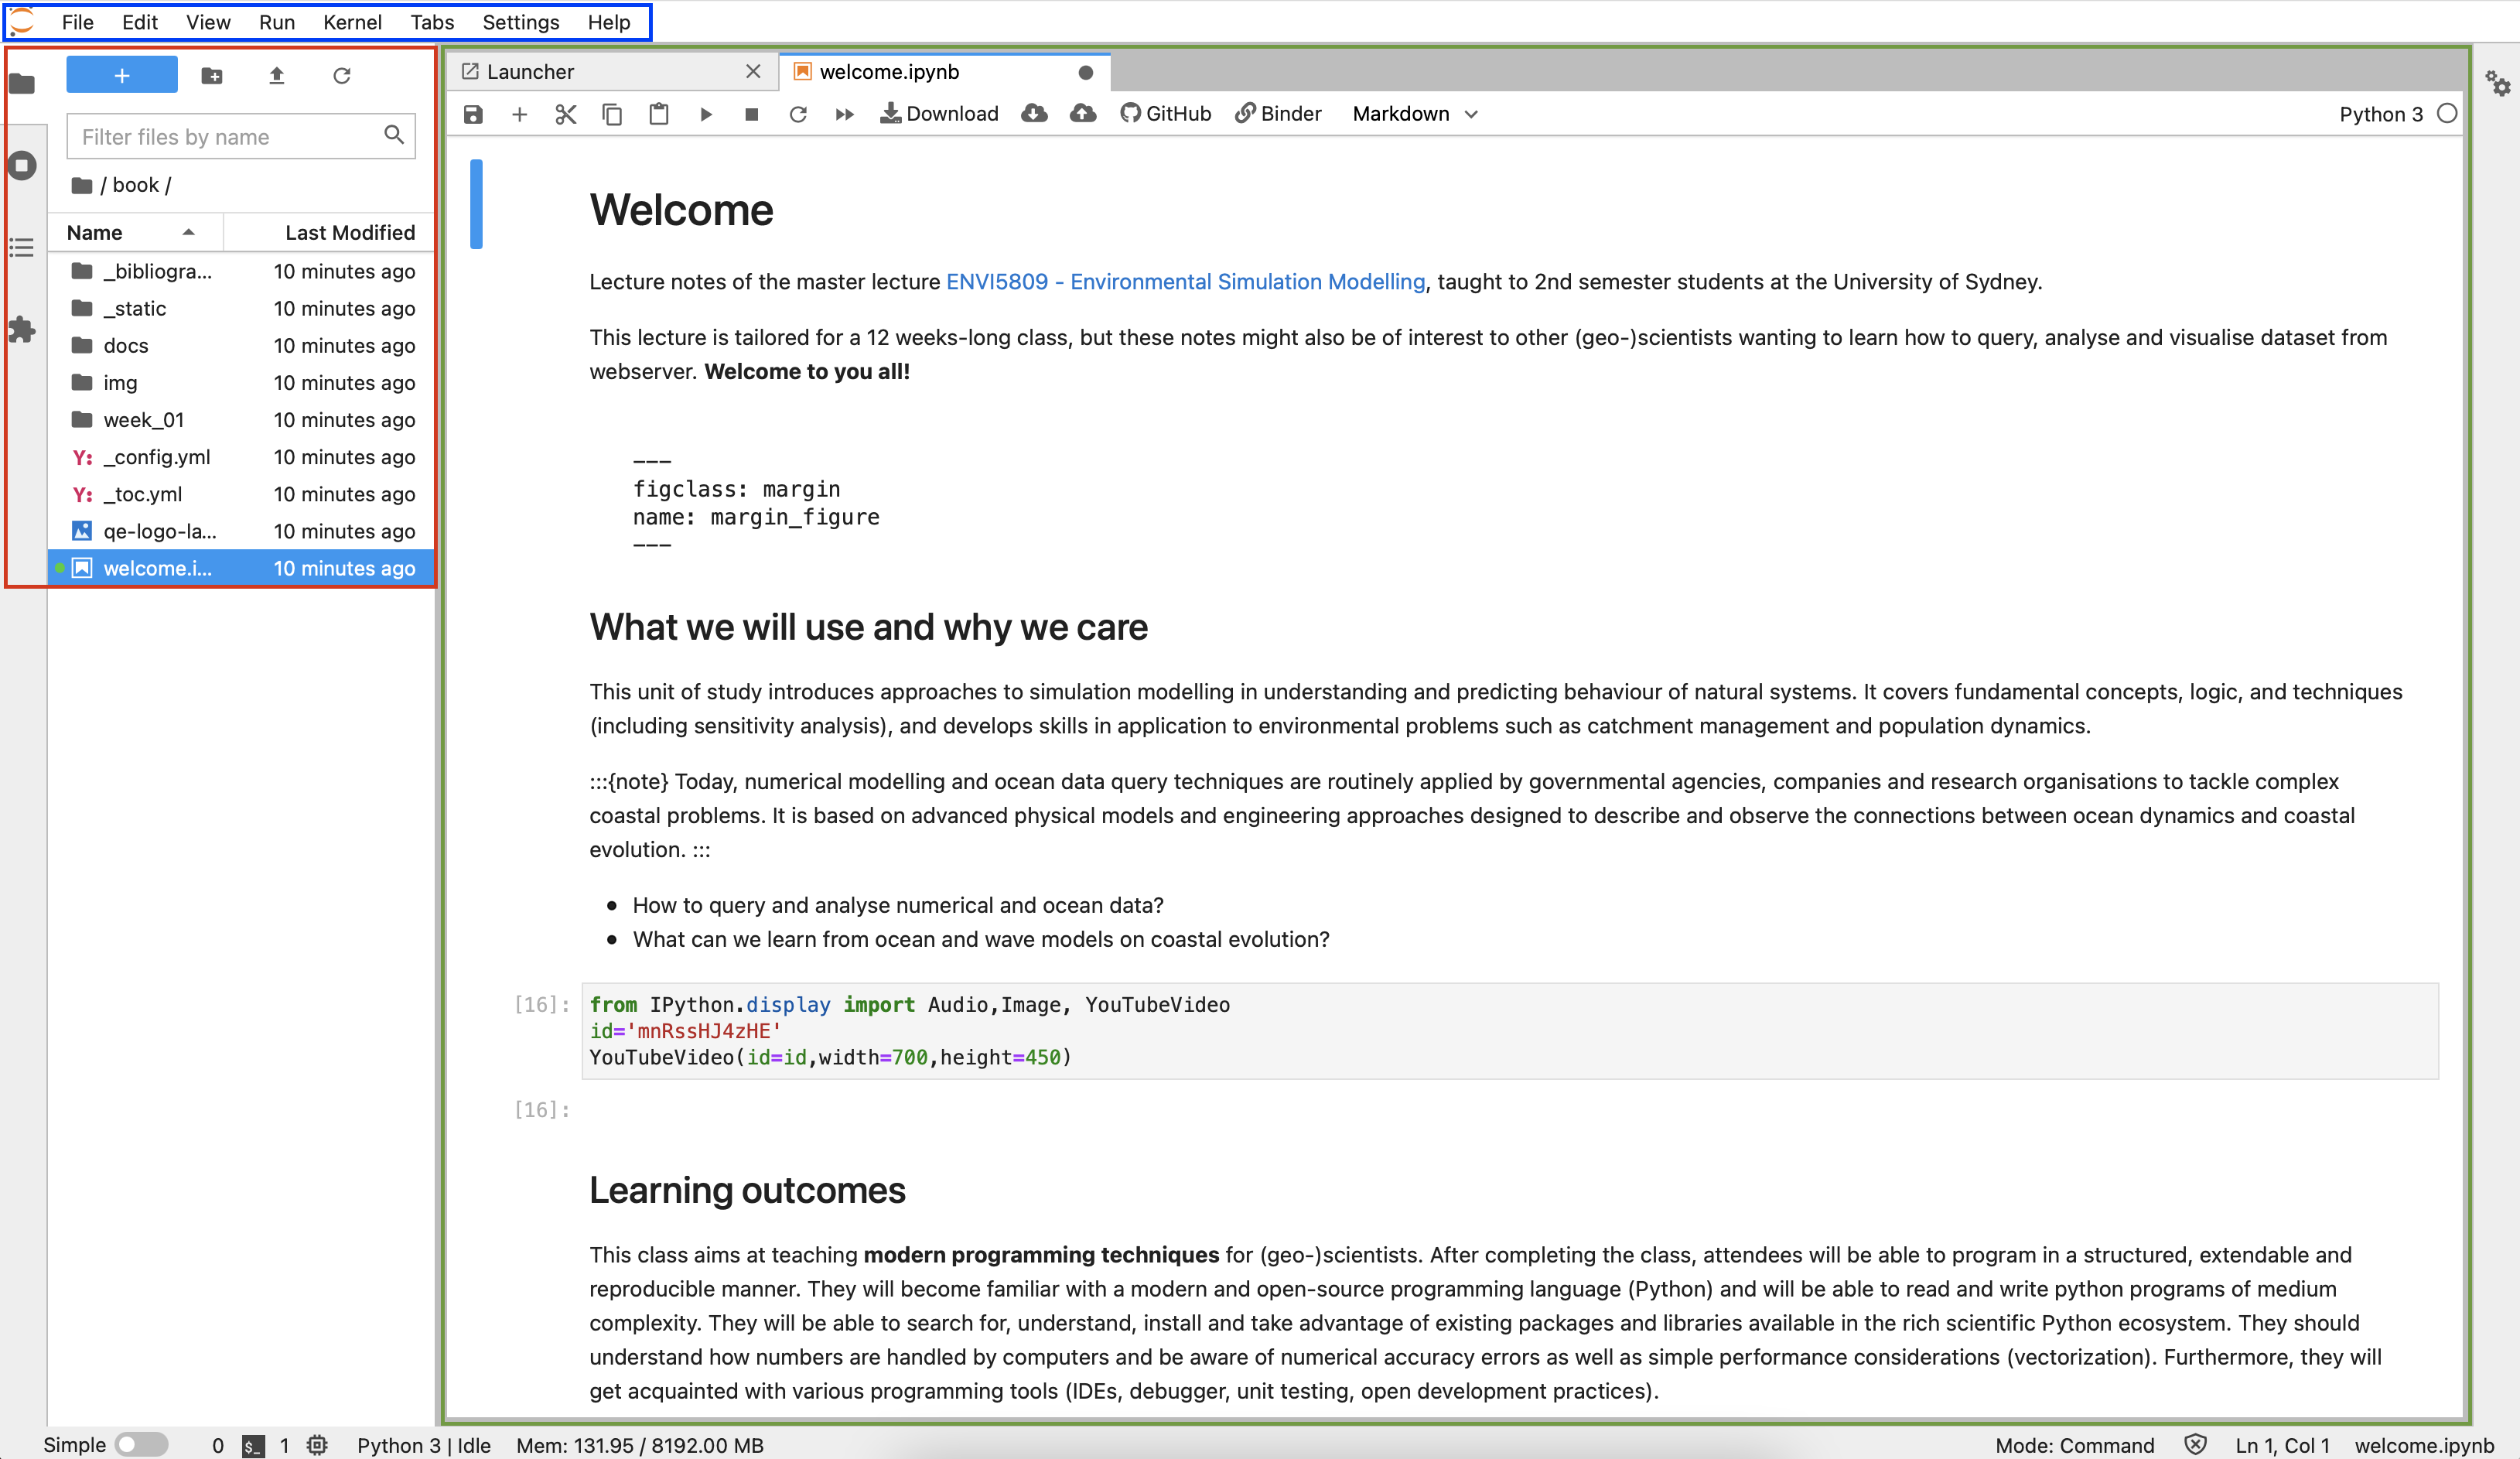
This is the JupyterLab development environment. It is quite intuitive and most people find their way through it without major struggle, but you might want to have a look at the excellent documentation as well.
The three main areas highlighted above are:
Menu Bar (blue): top-level menus that expose actions available in JupyterLab
Left Sidebar (red): contains a number of commonly-used tabs, such as a file browser (most important), a list of running kernels (i.e.: notebooks) and terminals, the command palette, and a list of tabs in the main work area
Main Work Area (green): the main work area in JupyterLab enables you to arrange documents (notebooks, text files, etc.) and other activities into panels of tabs that can be resized or subdivided. Drag a tab to the center of a tab panel to move the tab to the panel. Subdivide a tab panel by dragging a tab to the left, right, top, or bottom of the panel
Download and upload files to MyBinder/JupyterLab
Since your MyBinder environment is temporary, you might find it useful to download the notebooks you modified during your session, and/or upload notebooks or data that you store on your computer.
To download a notebook, use the left sidebar’s file explorer:
right-click on the file you’d like to download and select Download. You
can also download the notebook in various static formats
in the menu: File → Export Notebook As (we recommend
html). Be aware that some formats might not export properly.
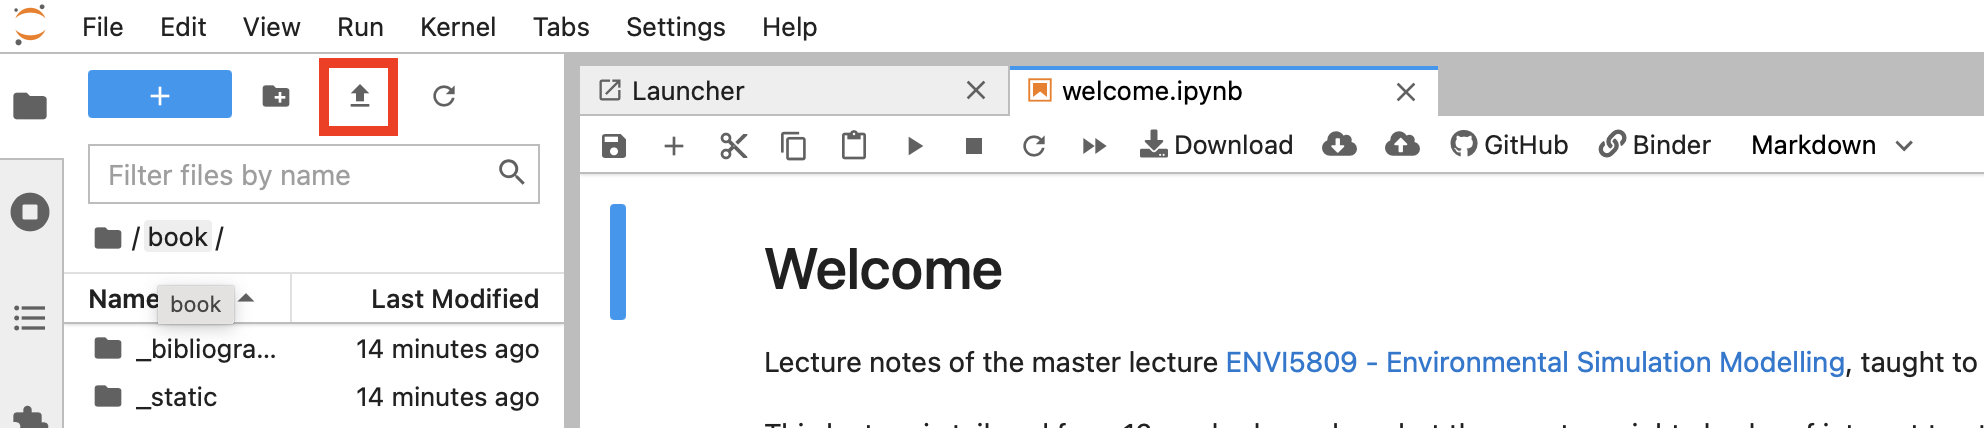
To upload a file or notebook, use the up-arrow button on the top of the sidebar: you can upload any file - text or data.
More about JupyterLab
JupyterLab will be our primary method for interacting with the computer. It contains a complete environment for interactive scientific computing which runs in your web browser. As mentioned previously, Jupyter is an open source python project that was started by scientists like yourselves who wanted a more effective way to interact with their computers.
JupyterLab has excellent documentation. Rather than repeat that documentation here, I point you to their docs. The following pages are particularly relevant:
You will gain experience and familiarity with JupyterLab over the course of the semester as we use it in our weekly lectures and practicals.